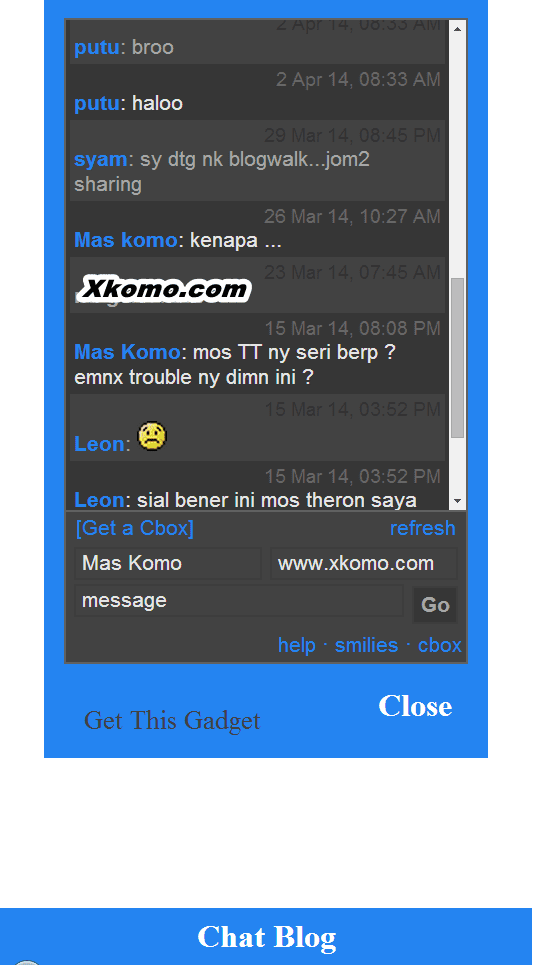
Sebelumnya saya sudah membuat tutorial cara memasang ChatBox melayang di Blogger, di artikel kali ini saya akan membagikan tutorial cara menambahkan widget Chat Box di Blogger seperti ShoutBox/SHoutMix, beserta modifikasi kotak chat menjadi melayang di sebelah kiri atau kanan blog.
Pada tutorial sebelumnya kan itu untuk widget Chat Box, lalu bagaimana dengan widget Shoutbox/Shoutmix? kali ini saya mencoba membuat Show/Hide content untuk widget selain Chat Box.
Table of Contents
Demo Widget Chat Box di Blogger dengan Menu Show/Hide
Tutorial Cara Membuat Chat Box di Blogger ShoutBox/ShoutMix dengan Menu Show/Hide
1. Tambahkan CSS Chat Box ke Template Blogger
Tambahkan CSS ini ke templates blog, bisa di letakan di atas ]]></b:skin>
#at {
    position:fixed;
    left:0;
    z-index:1000;
}
* html #at {
    position:relative;
}
.attab {
    height:100px;
    width:30px;
    float:left;
    cursor:pointer;
    background:url();
    bottom:0;
    margin-left:-8px;
}
.atcontent {
    float:left;
    background:#2484f1;
    padding:10px;
}
#ButtonchatBlog-Xkomo {
    bottom:0px;
    left:0;
    position:fixed;
    padding:5px 8px;
    background:#2484f1;
    text-decoration:none;
    color: #fff;
    font-weight:bold;
    width:250px;
       text-align:center;
}
#ButtonchatBlog-Xkomo a {
    text-decoration:none;
    color: #fff;
    font-weight:bold;

}
#ButtonClose-Xkomo {
    text-decoration: none;
    color: rgb(255, 255, 255);
    font-weight: bold;
    padding: 2px;
    right: 13px;
    bottom: 15px;
    position: absolute;
    right: 41px;
}
#Buttonclose-Xkomo a {
    text-decoration:none;
    color: #fff;
    font-weight:bold;
    float:right;
}
#ButtonLink-Xkomo {
    color: rgb(66, 66, 66);
    text-decoration: none;
    width: 65px;
    padding: 5px;
    margin: -9px 10px -11px 5px;
    font-size: smaller;
}
2. Tambahkan JavaScript Show/Hide ke Blogger
function showHideAT() {
        var at = document.getElementById("at");
        var w = at.offsetWidth;
        at.opened ? moveAT(0, -400 - w) : moveAT(1000, 30);
        at.opened = !at.opened;
    }

    function moveAT(x0, xf) {
        var at = document.getElementById("at");
        var dx = Math.abs(x0 - xf) > 25 ? 35 : 1;
        var dir = xf > x0 ? 1 : -1;
        var x = x0 + dx * dir;
        at.style.bottom = x.toString() + "px";
        if (x0 != xf) {
            setTimeout("moveAT(" + x + ", " + xf + ")", 10);
        }
    }

    var at = document.getElementById("at");
    at.style.bottom = (-200 - at.offsetWidth).toString() + "px";
3. Tambahkan Kode HTML Pemanggil Script Chat Box
<div id="at">
    <div class="attab" onclick="showHideAT()"></div>
    <div class="atcontent">
        <div align="center">

<!-- Pasang Kode WIdget nya di sini-->
            </div>
        </div>
        <br /> <a id="ButtonClose-Xkomo" href="javascript:void(0);" onclick="showHideAT()" alt="klik close untuk menutup"> Close</a>
 <span><a href="https://xkomo.com/tutorial-membuat-show-hide-widget-Shoutbox-Shoutmix" id="ButtonLink-Xkomo">Get This Gadget</span>
    </div>
    </a>
</div>
<a id="ButtonchatBlog-Xkomo" href="javascript:showHideAT()" />Chat Blog</a>
</div>
Nah itu semua bahan yang kita perlukan untuk membuat widget Show/Hide Shoutbox/Shoutmix, sekarang tinggal bagaimana cara menggabungkannya di templates Blogger kamu.
Cara Menambahkan Widget Chat Box di Blogger dengan Menu Show/Hide
Sebelum kita mulai membahas cara menggabungkan nya ada dua cara memasang widget ini, cara pertama bisa langsung di simpan lewat Template dan cara kedua dengan cara menambahkan widget HTML pada Tata Letak.
Nah biar simpel dalam artikel ini saya berikan tutorial nya dengan menambahkan widget HTML pada Tata Letak saja yah, untuk CSS bisa di simpan dalam Template ]]></b:skin> atau bisa langsung di jadikan satu paket dengan kode HTML widget Show/Hide Shoutbox/Shoutmix ini.
- Langkah pertama kamu buka Tata Letak pada blog.
- Klik Tambahkan Widget.
- Pilih widget HTML/JavaScript.
- Kemudian Paste kode HTML, CSS, JavaScript menu Show/Hide dan kode widget ShoutBox/ShoutMix.
- Simpan.
<style type="text/css">
#at {
    position:fixed;
    left:0;
    z-index:1000;
}
* html #at {
    position:relative;
}
.attab {
    height:100px;
    width:30px;
    float:left;
    cursor:pointer;
    background:url();
    bottom:0;
    margin-left:-8px;
}
.atcontent {
    float:left;
    background:#2484f1;
    padding:10px;
}
#ButtonchatBlog-Xkomo {
    bottom:0px;
    left:0;
    position:fixed;
    padding:5px 8px;
    background:#2484f1;
    text-decoration:none;
    color: #fff;
    font-weight:bold;
    width:250px;
       text-align:center;
}
#ButtonchatBlog-Xkomo a {
    text-decoration:none;
    color: #fff;
    font-weight:bold;

}
#ButtonClose-Xkomo {
    text-decoration: none;
    color: rgb(255, 255, 255);
    font-weight: bold;
    padding: 2px;
    right: 13px;
    bottom: 15px;
    position: absolute;
    right: 41px;
}
#Buttonclose-Xkomo a {
    text-decoration:none;
    color: #fff;
    font-weight:bold;
    float:right;
}
#ButtonLink-Xkomo {
    color: rgb(66, 66, 66);
    text-decoration: none;
    width: 65px;
    padding: 5px;
    margin: -9px 10px -11px 5px;
    font-size: smaller;
}
</style>
<script type="text/javascript">
    function showHideAT() {
        var at = document.getElementById("at");
        var w = at.offsetWidth;
        at.opened ? moveAT(0, -400 - w) : moveAT(1000, 30);
        at.opened = !at.opened;
    }

    function moveAT(x0, xf) {
        var at = document.getElementById("at");
        var dx = Math.abs(x0 - xf) > 25 ? 35 : 1;
        var dir = xf > x0 ? 1 : -1;
        var x = x0 + dx * dir;
        at.style.bottom = x.toString() + "px";
        if (x0 != xf) {
            setTimeout("moveAT(" + x + ", " + xf + ")", 10);
        }
    }
</script>
<div id="at">
    <div class="attab" onclick="showHideAT()"></div>
    <div class="atcontent">
        <div align="center">

<!-- Ganti Tulisan Ini dengan Kode Widget kamu-->
            </div>
        </div>
        <br /> <a id="ButtonClose-Xkomo" href="javascript:void(0);" onclick="showHideAT()" alt="klik close untuk menutup"> Close</a>
 <span><a href="https://xkomo.com/cara-menambahkan-widget-chat-box-di-blogger/" id="ButtonLink-Xkomo">Get This Gadget</span>
    </div>
    </a>
</div>
<script type="text/javascript">
    var at = document.getElementById("at");
    at.style.bottom = (-200 - at.offsetWidth).toString() + "px";
</script><a id="ButtonchatBlog-Xkomo" href="javascript:showHideAT()" />Chat Blog</a>
</div>
Silakan ganti kode pada line 91, dengan kode widget ChatBox, ShoutBox, atau ShoutMix milik kamu.
<!-- Ganti Tulisan Ini dengan Kode Widget kamu-->Kesimpulan
Silahkan mencoba dan berkreasi sesuka hati kamu yah, untuk blog yang menggunakan Font Awesome bisa menambahkan Font -nya setelah chat blog atau membuat pseudo element :before pada CSS di atas.
Semoga artikel ini bermanfaat.
REFERENSI
Script JavaScript dari http://dextoshare.blogspot.com/2012/01/membuat-buku-tamuchat-box-show-hide.html


